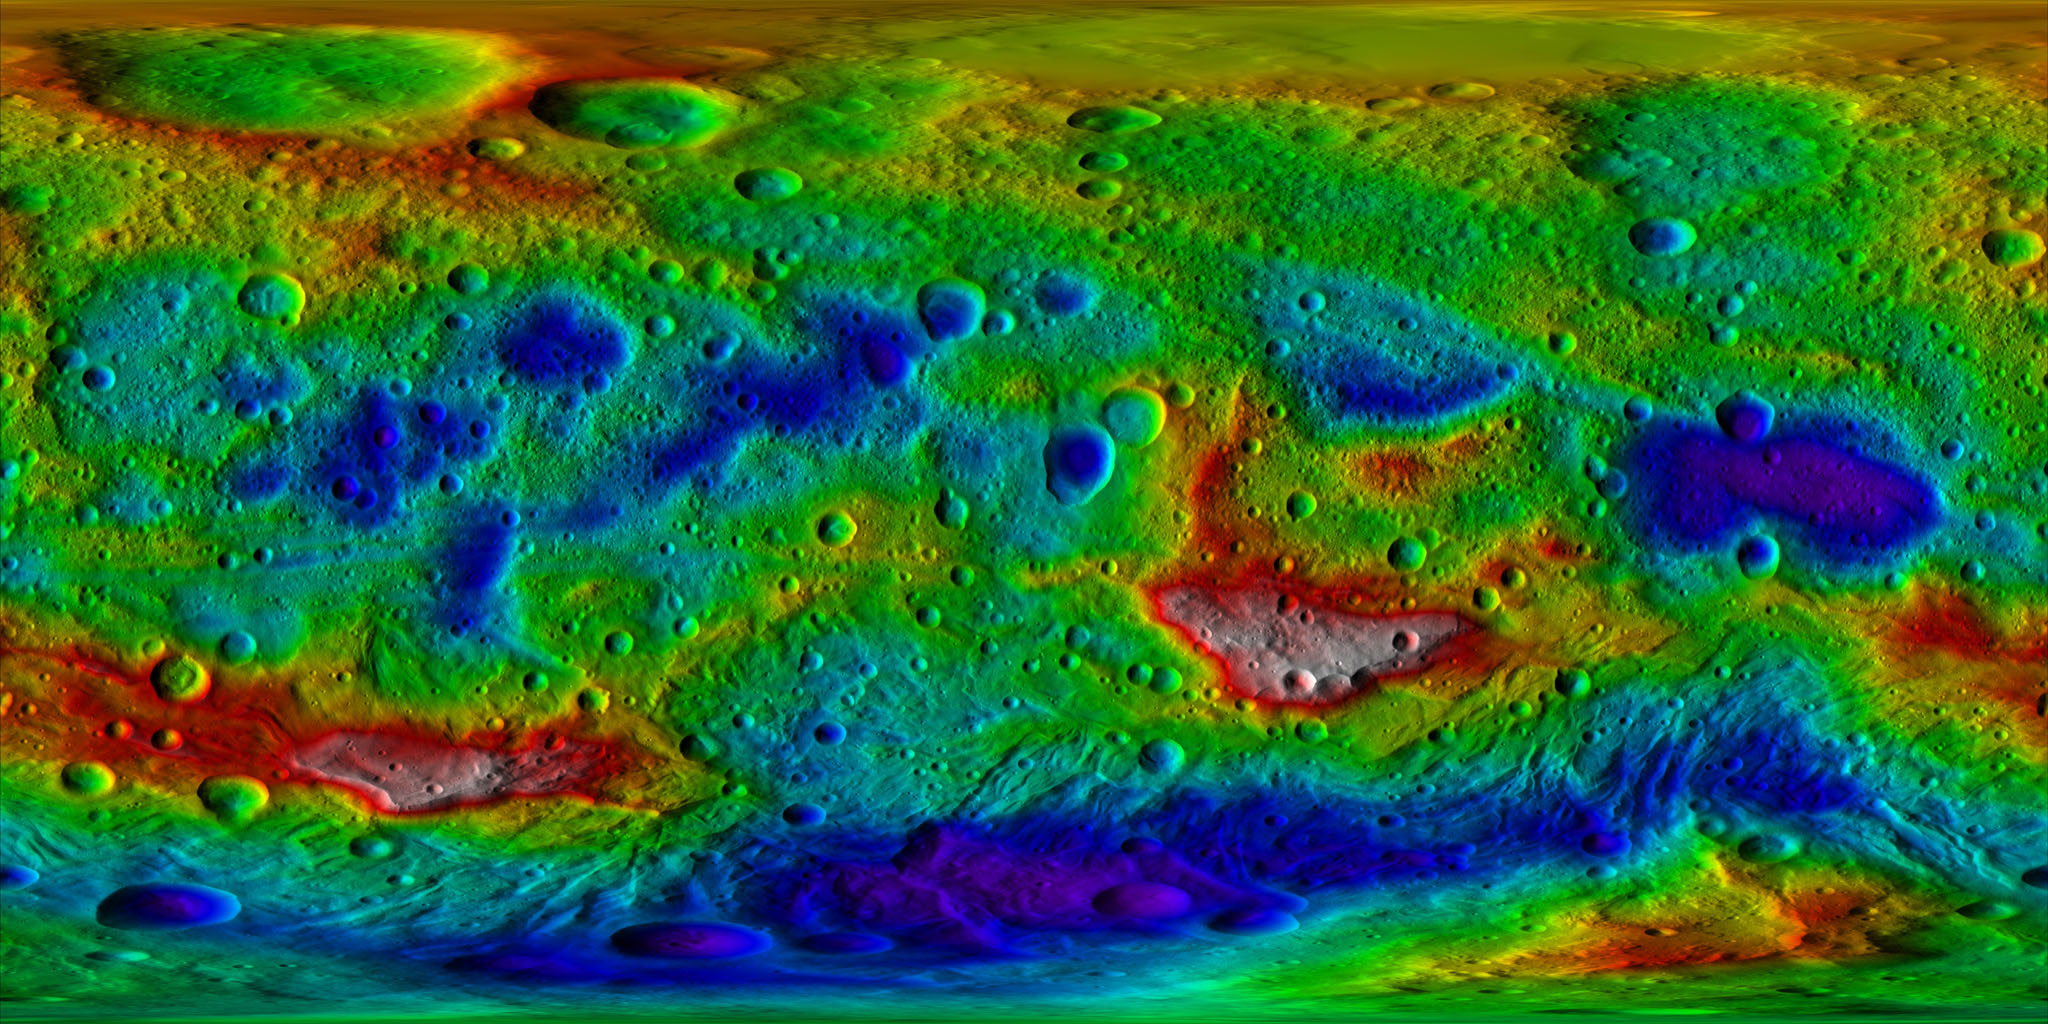
I'm trying to create worlds using bitmaps of specific places, can anyone tell me how the bitmap importer for Perfect World interprets colors on the bitmap file to elevation? I keep ending up with land masses where water should be. Included is a bitmap file I'm trying to import now. The middle section of southern sea keeps turning into an island for some reason.

The shadows are not a big problem for this and Gimp can do this, however if you want the areas with the highest peaks, it'll require a lot of work since the peaks are whiteish which is a lot more problematic than the shadows.

Should work if you cut it down to the areas you want, unless you want the white parts (I'll go into that later) and use some auto level tool of any decent image editor, gimp, paint.NET (albeit this can only do that it cannot produce the image in the first place), Adobe Photoshop or Corel Paintshop should do this nicely.
For doing this yourself you need to split the image into Hue, Saturation and Value (lightness also works but will make it impossible to work in the peaks later).
Remove the value layer/image first, we don't need that at all, and only if you're interested in the peaks should you hang onto the Saturation layer/image.
Despeckle the Hue image, to get rid of minor faults, and use negative colors on the image.
You should now have an image similar to mine, and you could stop here, but I'll explain how to do the rest.
If you want the real peaks first you need to retouch the areas with peaks (as they are likely to have faults like the black bowling pin in mine since the despeckle can't get rid of it all, do a copy of the image, after that adjust the brightness levels of the image to the approximate proportions of the colored bands height compared to the difference in height over the wole image (so that the white turns grey), then despeckle the saturation image as well as you can, and apply negative colors. Now take the copied image that you didn't apply a level change to, by gamma or levels or any other means, make sure you only have the most clear white left, the rest should be black or 0% alpha, use this as an alpha layer to your created saturation image, put this as a top layer on the image and set the layer mode to screen, then adjust the levels of this top layer until you ahve a few pixels that have the maximum brightness.
These extra steps may seem a bit difficult though, but except for retouching and checking the height levels of the different colors someone who is skilled in gimp (not me or i'd rather have done that long ago) should be able to write a script to do this.
/Zorbeltuss

 Author
Topic: PerfectWorldDF world creator utility v.1.9 (Read 459800 times)

